
This article presents the successfully completed Starlink installation in Fountain Hills, AZ by ProSat Networks 1-844-799-0258. We offer professional Starlink installation and IT network solutions for commercial businesses, residential homes, RV parks, campgrounds, construction sites, farm, airplane hangars, mining facilities and long-range, multi-building indoor and outdoor wireless networks across Arizona.
To book your Starlink installation, call us at 1-844-799-0258 or request a quote through our Contact Us form.
🔹Location: Fountain Hills, AZ
🔹Property Type: Residential home
🔹Property Size: 3700 sqft, one story home
🔹Roof Type: Clay roof
🔹Starlink Kit: Standard kit
🔹Mount Solution: Non-penetrating roof mount
Our Starlink Installation SMEs received a service request for Starlink installation in Fountain Hills, AZ. Our team provided a professional service by carrying out the following tasks:
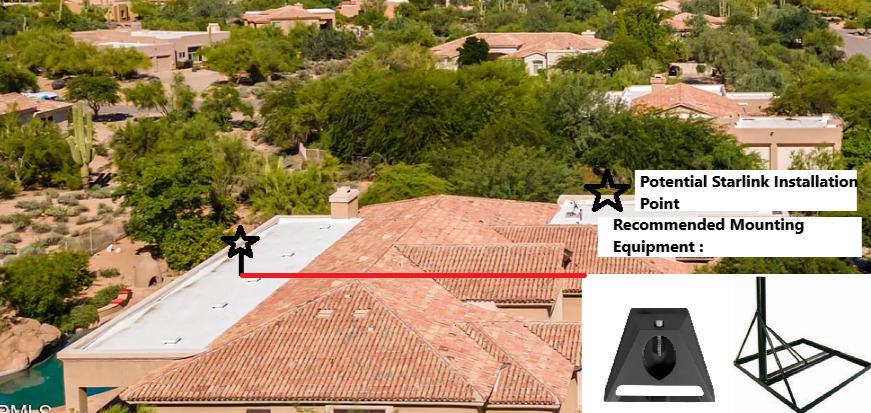
Our Starlink installation SME provided professional assistance by performing the initial offsite assessment. This is to identify the structure of the property, potential obstructions, mouting solution, potential installation point for the dish through satellite imagery and obtaining onsite photos. This assessment allowed us to determine the materials, equipments and manpower necessary to ensure smooth and hassle-free Starlink installation.
After the initial offsite assessment, our team sent an installation proposal to the customer for review and approval. Once approved and all materials and equipment are available onsite, the installation schedule is coordinated with our professional Starlink installers in Fountain Hills, AZ.
Our professional Starlink installers arrived as scheduled to perform the following scope of work:
🔹To install the Starlink Standard Kit using non-penetrating roof mount.
🔹Route proprietary Starlink cable from the dish to indoor main Starlink WiFi Mesh Router location.
🔹Activate & configure the three Starlink Gen3 WiFi mesh routers and place them on customer approved location with optimal coverage across the home.
🔹Guide the customer on how to use the Starlink App.
🔹Test and document the installations with photos.
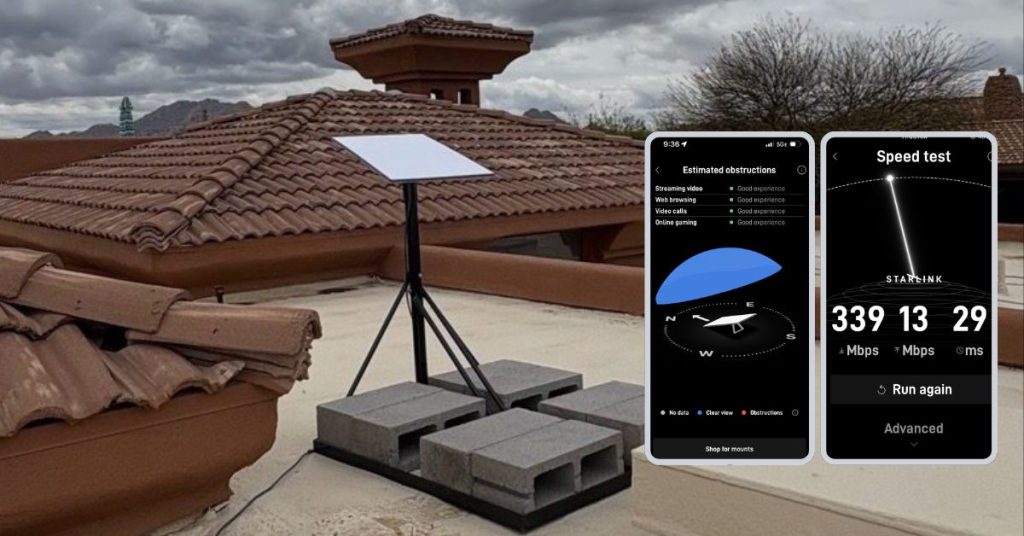
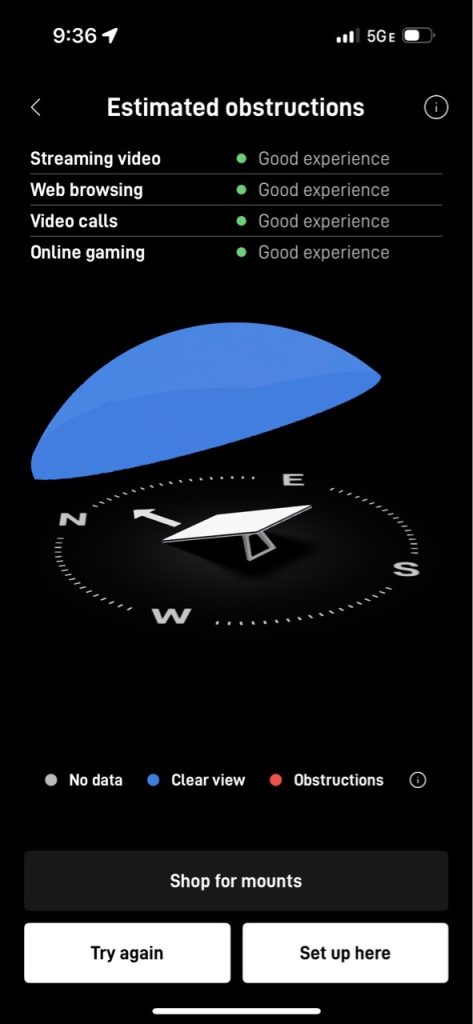
To begin the installation, our professional Starlink installer conducted a Starlink obstructions test to confirm if the location for dish installation has ”Good Experience” ratings. Confirming that the chosen location supports smooth streaming, browsing, video calls and gaming.
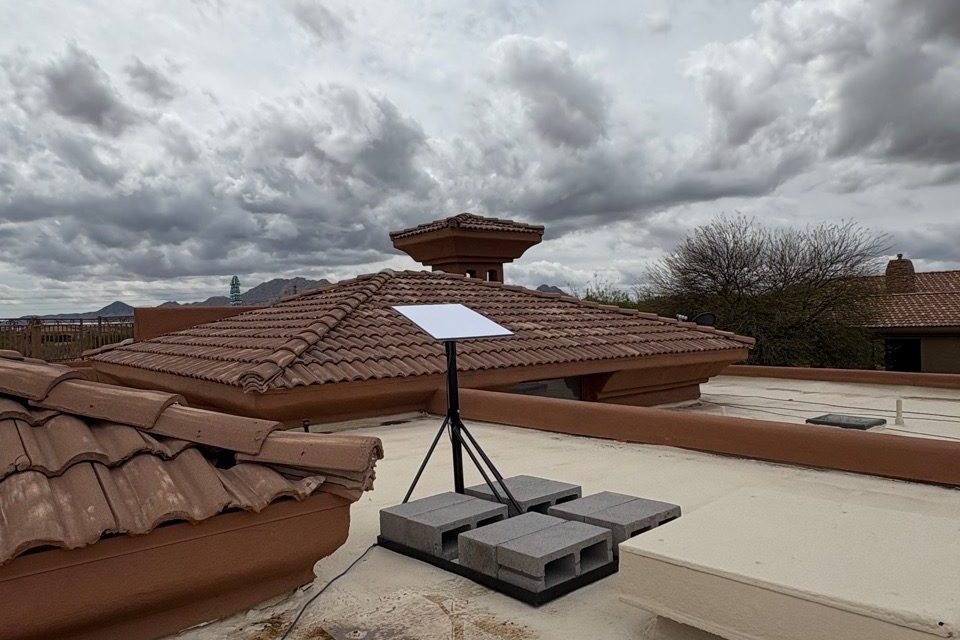
Then the Starlink Standard dish is mounted using a non-penetrating roof mount. A reliable mounting solution for homes where drilling into the roof is not an option, preventing potential leaks or structural damage. A cinder blocks were used to keep the mount securely in place without requiring bolts or screws into the roofing surface. The mount was positioned at an optimal angle to prevent movement caused by wind or extreme weather conditions.
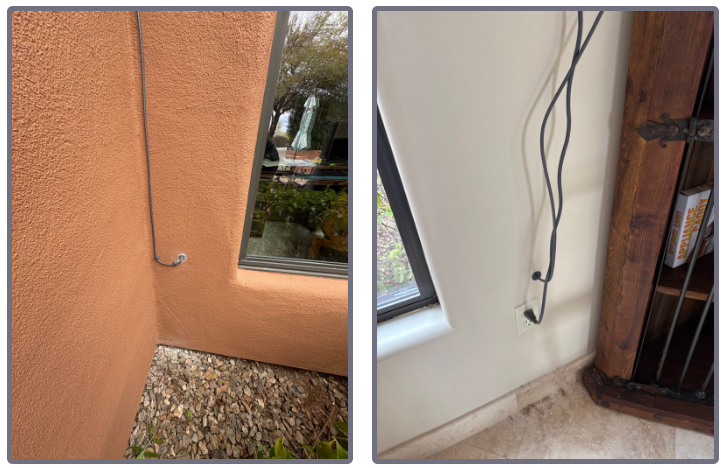
The Starlink cable is carefully routed from the outdoor dish to the indoor location of the Gen3 WiFi mesh router through a cable entry point created. The entry point was sealed with grommet and weatherproof sealant.
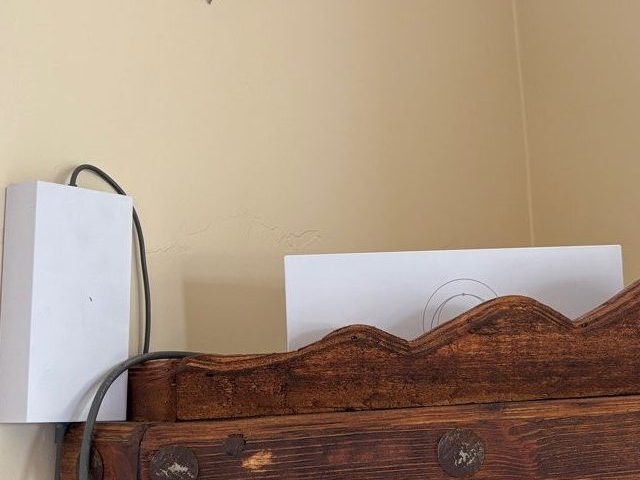
Next, the cable was plugged in to the Gen3 WiFi mesh router. Powered on, activated and configured the customer’s preferred network name (SSID) and password.) and password.
The customer was provided with a walkthrough on how to use the Starlink App's key features, including:
🔹Managing their SSID
🔹Resetting their WiFi password
🔹Running speed tests
🔹Refreshing or resetting the Starlink network
🔹Troubleshooting common connectivity issues
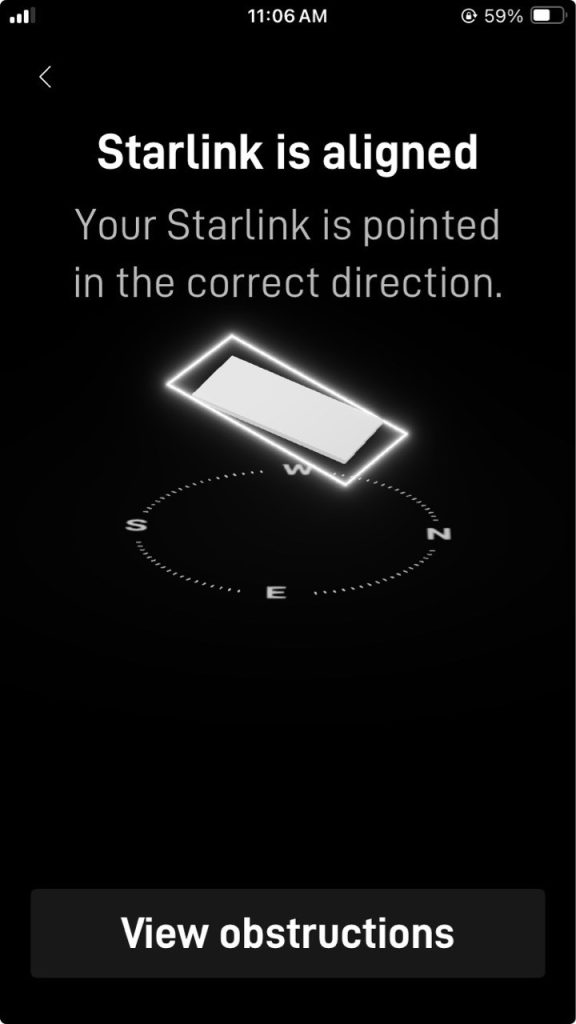
After the installation, our team performed a Starlink Alignment Test to ensure the dish was in the best possible position for continuous satellite connectivity. The process included carefully assessing the dish’s position, considering the elevation angle, azimuth direction, and potential obstructions (e.g., trees, buildings, or other structures).
Then, the Starlink Speed Test was conducted to test the system's internet performance. It is important to note that Starlink requires approximately 12 hours to fully synchronize with the satellite network after initial setup. During this period, the system actively scans the sky, connects to available satellites, and optimizes its positioning to ensure the best possible signal strength and stability. Users may experience fluctuations in connectivity, speed, or brief dropouts as the dish fine-tunes its alignment and establishes a consistent link with the satellite constellation. The connection stabilizes once the synchronization process is complete, delivering reliable high-speed internet performance.
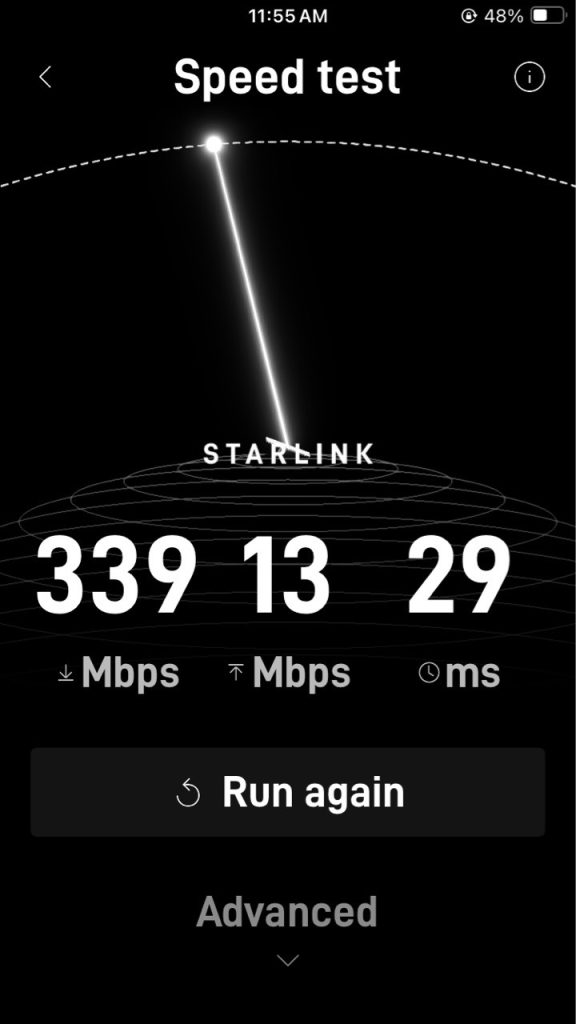
This speed test results confirm that the Starlink setup operates at peak performance, providing fast download speeds, stable upload rates, and low latency. These results reflect a successful installation with a clear line of sight to the satellites, minimal interference, and strong signal strength, guaranteeing a reliable internet connection.
Call us at 1-844-799-0258 to schedule your Starlink installation or to address any service-related inquiries.
ProSat Networks offers Starlink installation and IT network services to nearby towns and cities including:
DID YOU KNOW?
Fountain Hills, Arizona, is a picturesque desert town in Maricopa County, known for its stunning landscapes and small-town charm. Home to one of the world’s tallest fountains, which reaches up to 560 feet, the town attracts visitors and residents who enjoy its natural beauty and outdoor activities. Surrounded by the McDowell Mountains, Tonto National Forest, and the Fort McDowell Yavapai Nation, Fountain Hills offers excellent hiking, golfing, and stargazing opportunities.
Thank you for reading our Starlink installation articles.