
This article features the Starlink installation in Rolling Hills, CA that was successfully completed by ProSat Networks 1-844-799-0258. We offer professional Starlink installation and IT network solutions for commercial businesses, residential homes, RV parks, campgrounds, construction sites, agricultural operations, airplane hangars, mining facilities and long-range, multi-building indoor and outdoor wireless networks across California.
To book your Starlink installation, call us at 1-844-799-0258 or request a quote through our Contact Us form.
🔹Location: Rolling Hills, CA
🔹Property Type: Residential home
🔹Property Size: 9555 sqft, one-story home
🔹Roof Type: Clay or concrete tiles
🔹Starlink Kit: Standard kit
🔹Mount Solution: Pivot mount
Our Starlink Installation SMEs received a service request for Starlink installation in Rolling Hills, CA. The customer wanted to upgrade from Starlink Standard Actuated (Gen2) to Standard (Gen3). Our team kick-off the installation process by conducting the following tasks:
Our Starlink installation SME conducted an initial offsite assessment to identify the customer requirements for the Starlink installation. This process involved analyzing satellite imagery, obtaining onsite photographs, and assessing the roof type and any potential obstructions that could affect the installation. This evaluation allowed us to determine the materials, equipment, appropriate mounting solutions, and manpower necessary to ensure smooth and hassle-free Starlink installation.
After the assessment, our team sent an installation proposal for customer's approval. Once approved and all materials and equipment are available onsite, the installation schedule is coordinated with our professional Starlink installers in Rolling Hills, CA.
Our professional Starlink installer arrived on schedule to perform the following scope of work:
🔹To Remove the existing Starlink Standard Actuated Kit (Gen2) from the main house and install it on the pool house then run the cables.
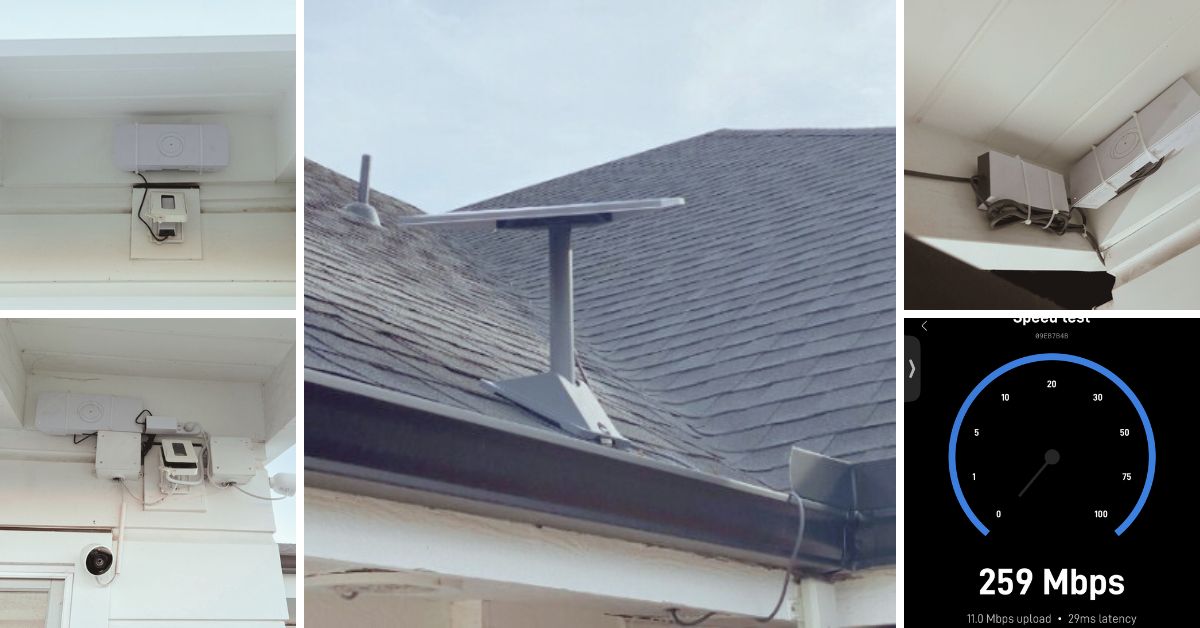
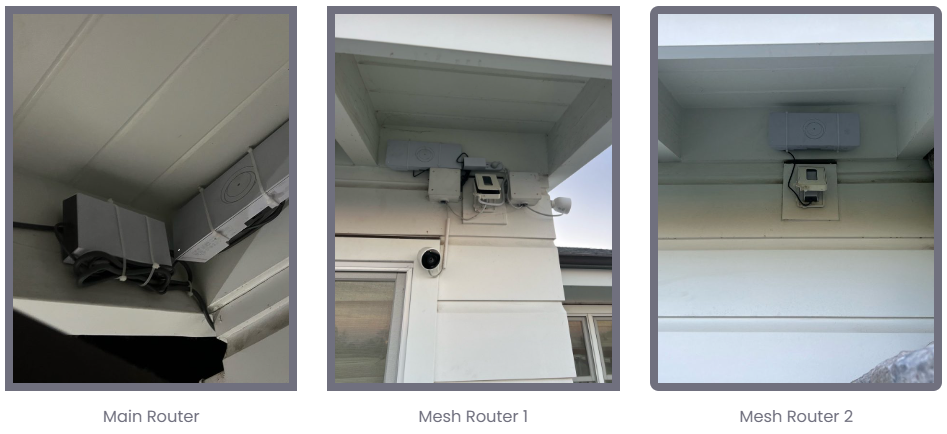
🔹Install the new Starlink Standard dish in the main house, and connect one Gen3 router as main and two Gen3 routers as a mesh
🔹Test and document the installations with photos.
🔹Guide the customer on how to use the Starlink App.
🔹Activate & configure the Starlink Gen3 WiFi mesh router.
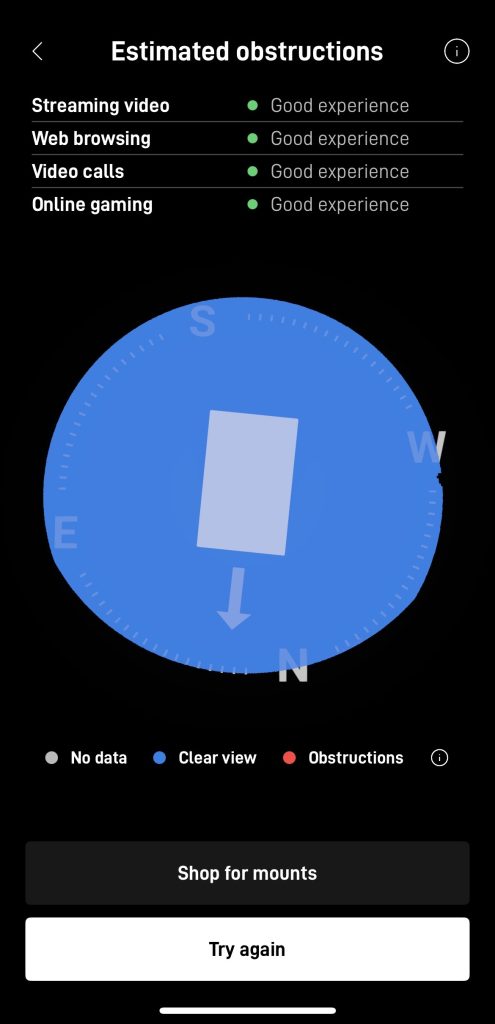
Our team initiated the installation by performing a Starlink obstructions test using the Starlink App. This crucial step in determining the ideal placement for the dish. This assessment ensured an unobstructed sky view, maximizing connectivity to the Starlink satellite network. The test yielded a "Good Experience" rating, verifying that the selected location provides a stable and high-speed connection for seamless streaming, browsing, video calls and gaming.
The Starlink dish is installed to the existing location of the Starlink Actuated dish using a pivot mount.

The proprietary Starlink cable was carefully routed from the outdoor dish to the indoor location of the Gen3 WiFi mesh router, which was positioned in a customer-approved location to maximize WiFi coverage and signal strength. The two Gen3 WiFi Mesh routers were positioned on pool house and one for the outdoor pool area.
Next, we customized the Gen 3 WiFi Mesh Router using the Starlink App, configuring the customer's preferred network name (SSID) and password for a seamless connection. Finally, we provided the customer with a walkthrough of the Starlink App's key features, including:
Managing their SSID
🔹Resetting their WiFi password
🔹Running speed tests
🔹Refreshing or resetting the Starlink network
🔹Troubleshooting common connectivity issues
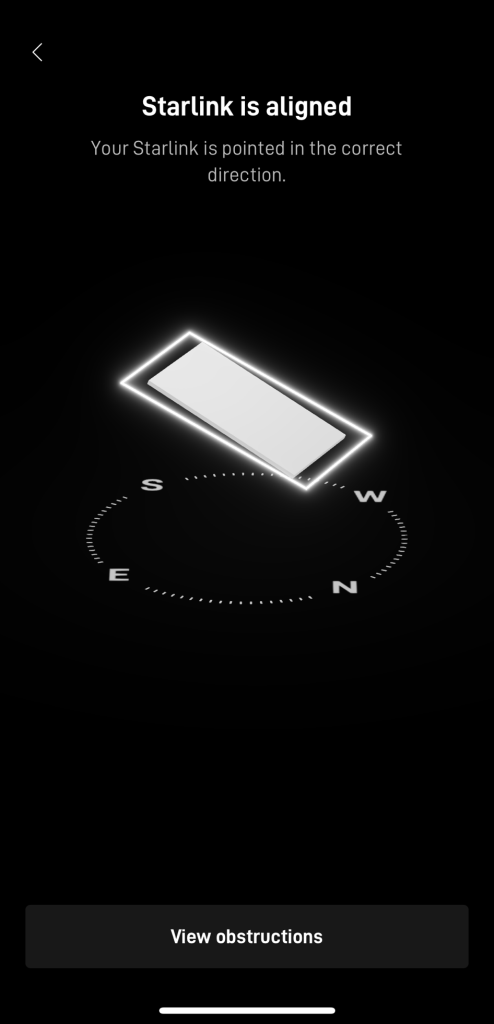
After the installation, our team performed a Starlink Alignment Test to ensure the dish was in the best possible position for continuous satellite connectivity. The process included carefully assessing the dish's position, considering the elevation angle, azimuth direction, and potential obstructions (e.g., trees, buildings, or other structures).
Then, the Starlink speed test was conducted to test the system's internet performance. It should be noted that Starlink can take as long as 12 hours to synchronize with the satellite network completely.
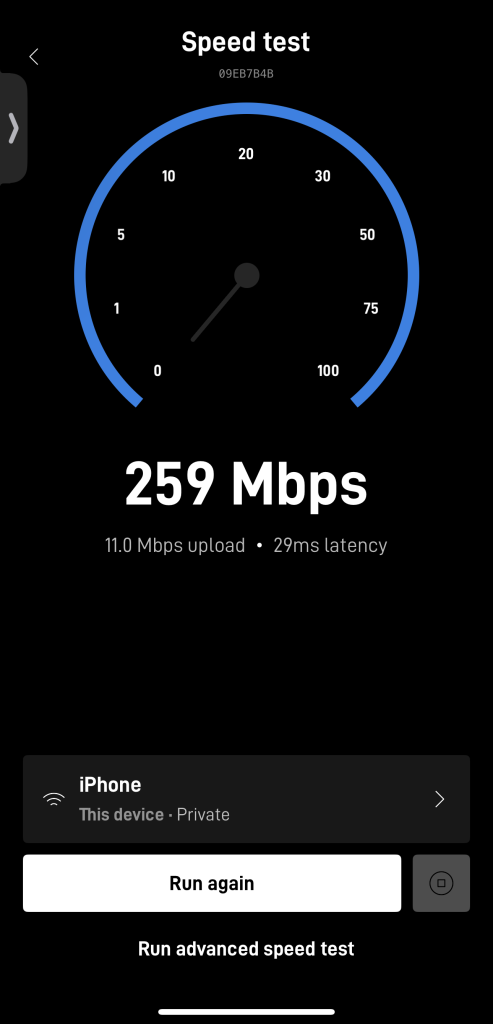
It is important to note that Starlink may take up to 12 hours to fully optimize, scanning the sky to connect with the satellites. Users may experience temporary speed fluctuations or brief dropouts during this process. Once complete, the connection stabilizes, ensuring reliable high-speed internet.
Call us at 1-844-799-0258 to schedule your Starlink installation or to address any service-related inquiries.
We also offer Starlink business installation and IT network services to nearby towns and cities including:
and more, just ask.
DID YOU KNOW?
Rolling Hills, California, is an exclusive gated community on the Palos Verdes Peninsula in Los Angeles County. Known for its sprawling estates, equestrian trails, and breathtaking views of the Pacific Ocean, Rolling Hills offers a serene, rural atmosphere just a short drive from the bustling city of Los Angeles. The town enforces strict zoning regulations to maintain its low-density, ranch-style living, with most properties sitting on large lots of at least one acre. Unlike many other affluent communities, Rolling Hills has no streetlights or commercial developments, preserving its natural beauty and quiet ambiance.
Thank you for reading our Starlink installation articles.